
In this guide you install QueryPress and get your first search up and running, step by step and with images. You don’t need to know how to code: if you can install a WordPress plugin, you already know the main part. At the end you’ll find an explanation of every option.
About the screenshots: they were taken on a WordPress site in Spanish. If your WordPress is in English, QueryPress shows every screen in English, and this guide uses the English names of each option.
Looking for QueryPress Pro? Pro is an add-on and needs this free plugin installed and activated: it doesn’t work without it. Follow this guide first and, at the end, the If you have QueryPress Pro section explains how to install Pro.
Install and activate the plugin
First download the file querypress-0.2.0.zip. Don’t unzip it: WordPress installs it as it is.
- In your WordPress dashboard go to Plugins → Add New.
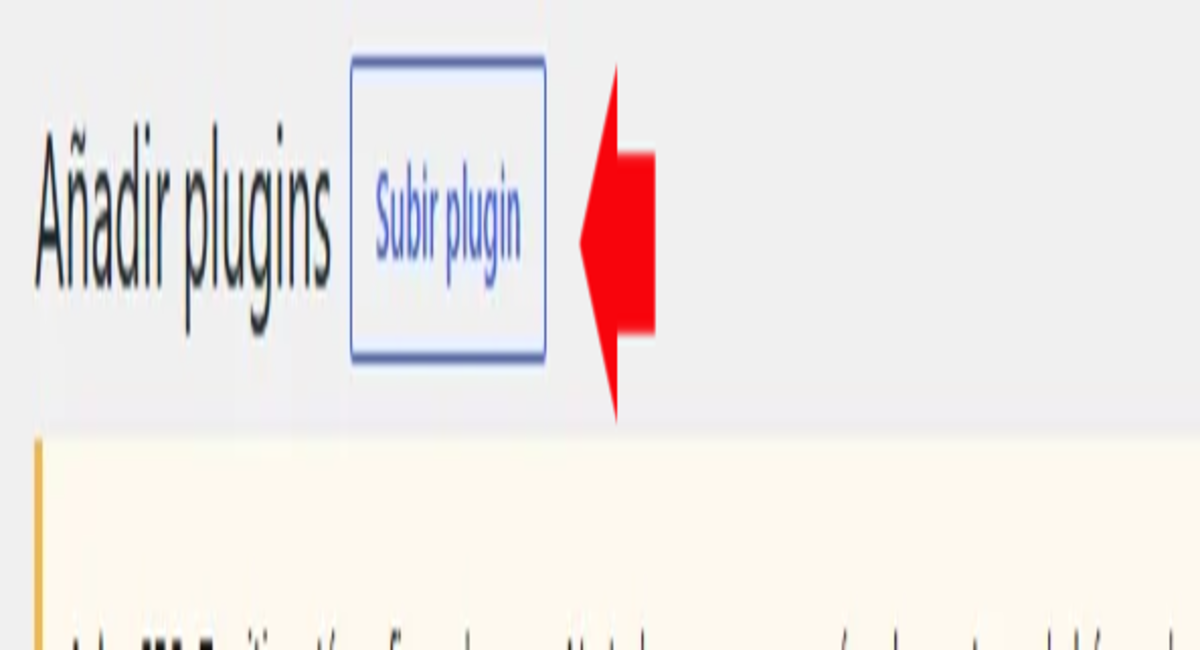
- Click the Upload Plugin button at the top of the page.
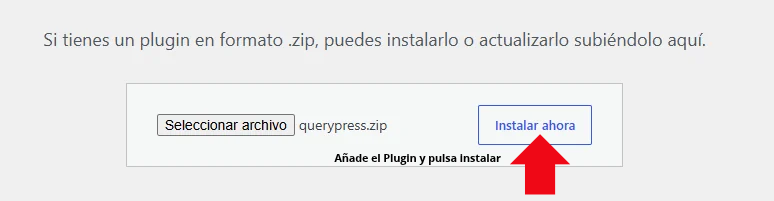
- Click Choose File and select
querypress-0.2.0.zip. - Click Install Now and wait a few seconds.
- When it finishes, click Activate Plugin.
Requirements: WordPress 6.0 or later and PHP 7.4 or later. Almost any current hosting meets them.
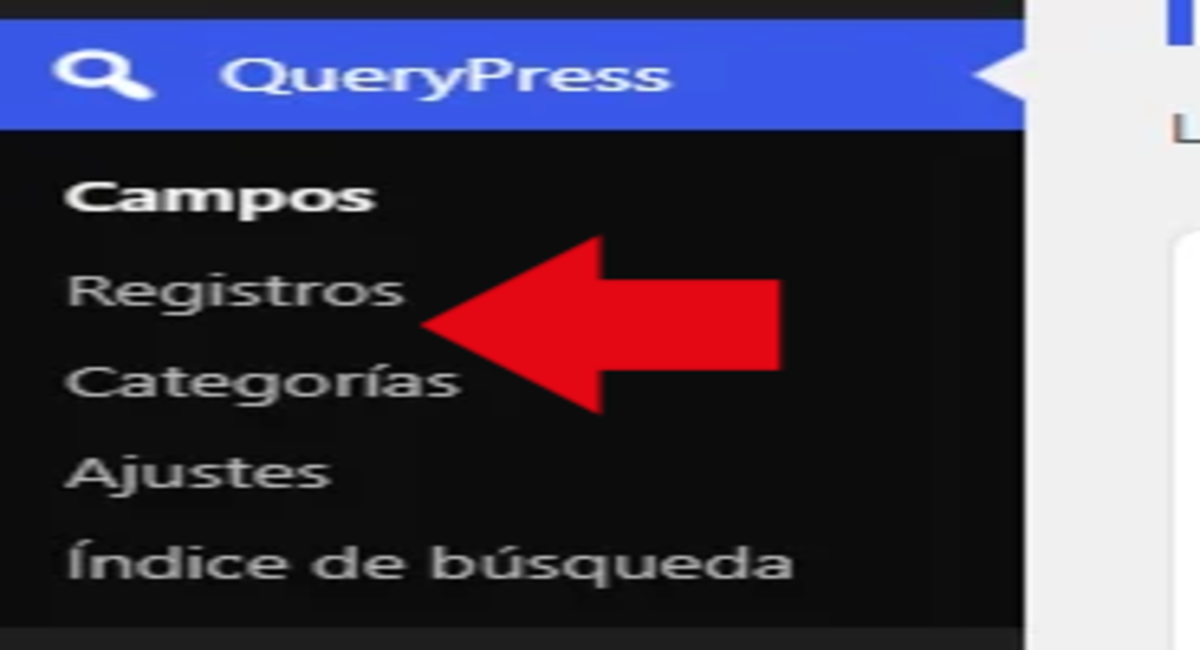
Once activated, a new item called QueryPress, with a magnifying glass, appears in your dashboard’s side menu. It has five sections:

| Section | What it is for |
|---|---|
| Fields | You define what data each record has (price, city, brand…). |
| Records | Where you create and edit what people can search for: businesses, products, properties… |
| Categories | To group your records. |
| Settings | The URL of your records, their names, how many results per page and more. |
| Search index | The status of the search and a tool to repair it if ever needed. |
Create your fields
Fields are the data each record will have. For a business directory, your fields might be City, Type and Average price. For a catalog, Brand, Model and Price.
Go to QueryPress → Fields and fill in the Add new field form:
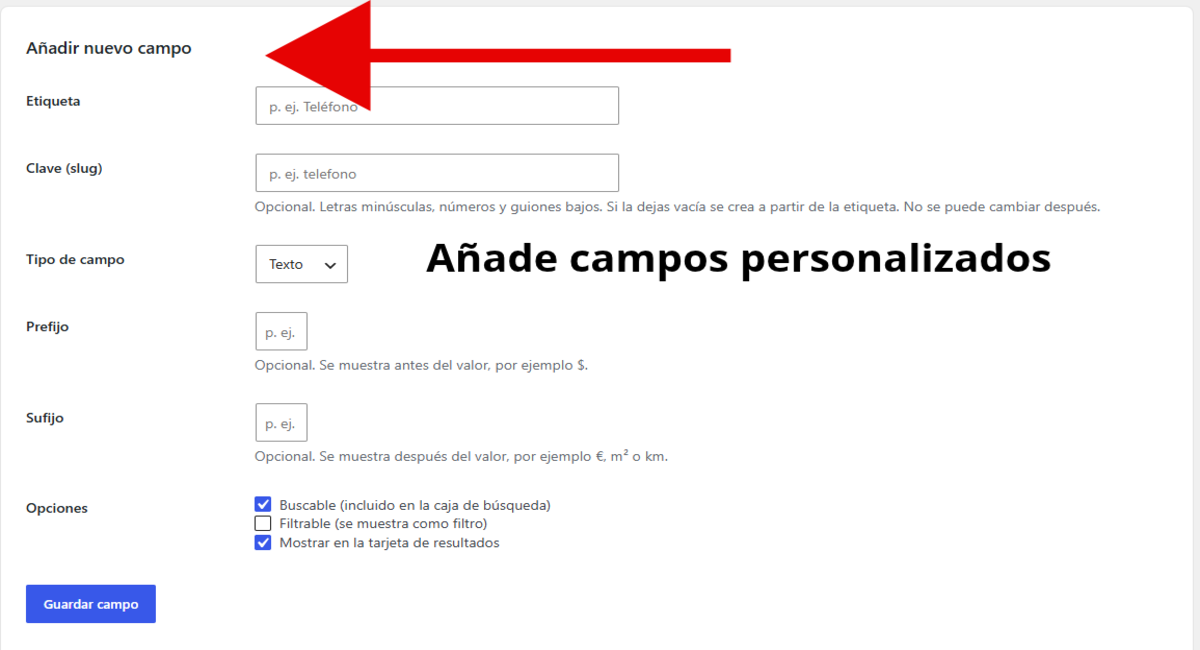
| Option | What it means |
|---|---|
| Label | The name people will see, for example “City”. It is the only required option. |
| Key (slug) | The internal name of the field. It is optional: if you leave it empty, it is created from the label (“Phone” becomes phone). It can’t be changed later. |
| Field type | Text for words (city, brand…) or Number for amounts (price, size…). It can’t be changed later either, so choose carefully. |
| Prefix | Optional. A symbol shown before the value, for example $. |
| Suffix | Optional. What is shown after the value: €, sq ft, miles… Large numbers are shown with a thousands separator, following your WordPress language. |
| Searchable | The text in this field is taken into account when someone types in the search box. |
| Filterable | Creates an automatic filter in the search (explained just below). |
| Show in the results card | The value appears on each result’s card. |
How a field becomes a filter
- A filterable Number field creates two boxes, Min. and Max., with the lowest and highest values as a hint.
- A filterable Text field with few different values (up to 50) creates a dropdown with those values.
- A filterable Text field with many different values creates a text box.
When you’re done, click Save field. Your fields appear in the Existing fields table, where you can edit or delete them.
Important: when editing a field you can change its label, prefix, suffix and checkboxes, but not its key or type. If you delete a field, the values already saved in your records are not deleted: they just stop being shown.
Create your categories
Categories group your records (for example “Bars”, “Restaurants” or “Apartments”). Go to QueryPress → Categories, type the name and click Add New Category.
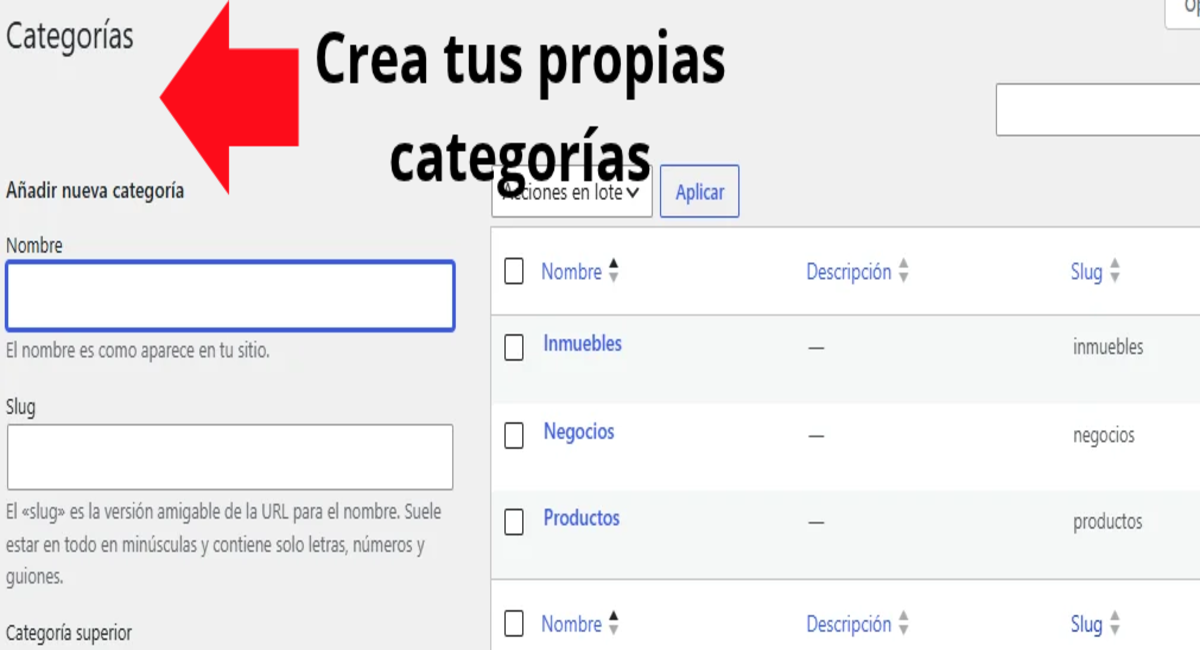
- You can create categories inside others with “Parent Category”. For example, “Bars” inside “Businesses”.
- The slug is the lowercase version of the name, without accents. You’ll use it if you want a search that only shows one category.
- The search shows a Category dropdown with the categories that have records.
Categories are optional: if your directory is simple, you don’t have to use them.
Add your records
A record is each thing you want people to find: a business, a product, an apartment… Go to QueryPress → Records → Add New Record.
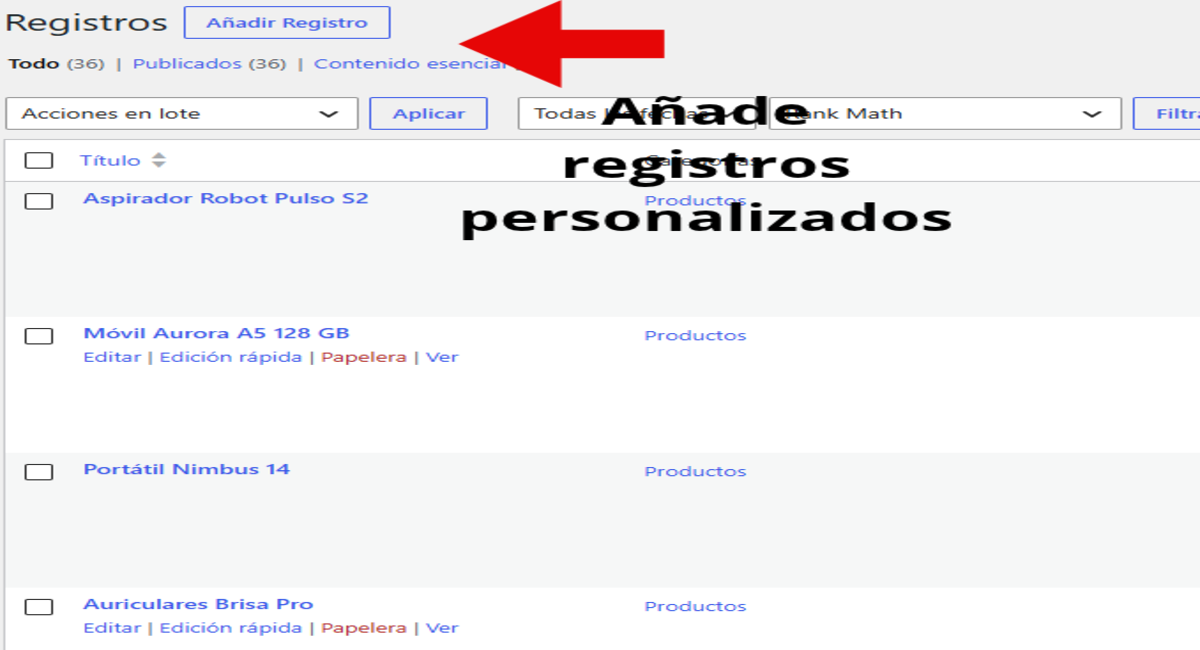
- Write the title. It is what appears on the card and the most important part for search.
- Write a description if you like. It is shown on the record’s page.
- Fill in the Record details panel with the fields you created: city, type, price…
- Tick its category.
- If you want, add a featured image: it will appear at the top of the card.
- Click Publish.
About images: landscape photos work best, around 1200 × 750 pixels and lightweight (under 150 KB). Records without an image are shown the same way, just without a photo.
Each record also has its own page, with a details table and a “← Back to results” link.
Review the settings
In QueryPress → Settings you adapt the plugin to your site. The defaults work well, so you can leave them and come back later.
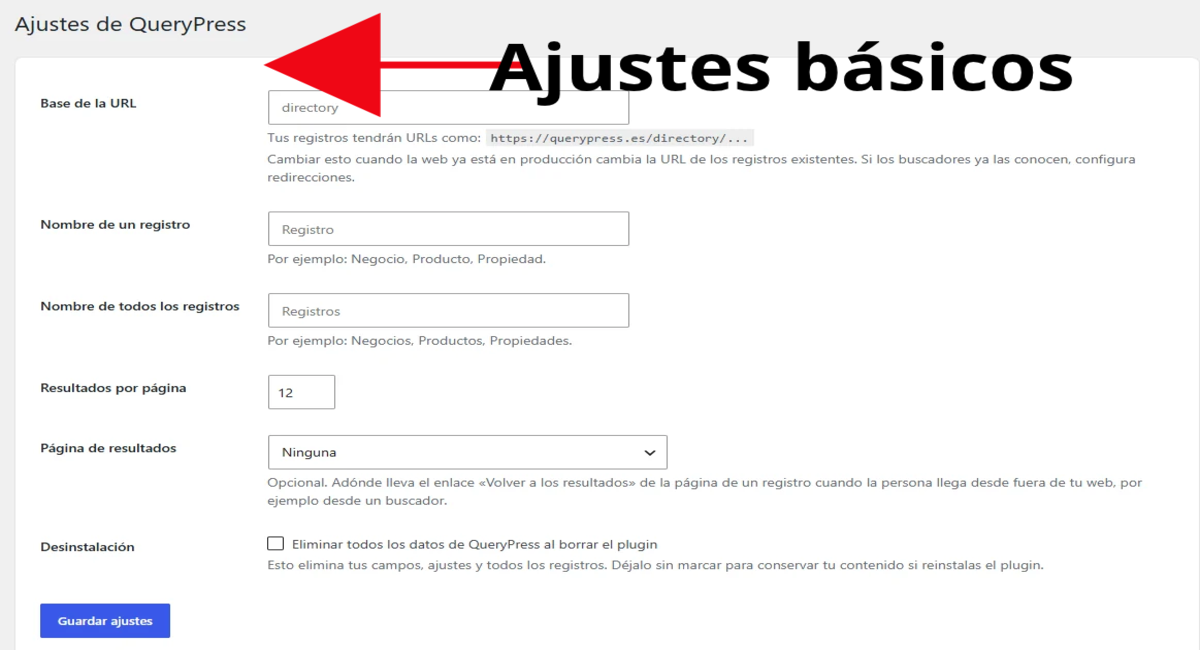
| Setting | What it does |
|---|---|
| URL base | The word before each record’s name in its address. The default is directory, which looks like this: yoursite.com/directory/record-name/. You can use whatever you prefer, for example businesses or products. |
| Name of one record | What you call each item: “Business”, “Product”, “Property”. It changes the texts in the dashboard. |
| Name of all records | The same in plural: “Businesses”, “Products”, “Properties”. |
| Results per page | How many cards are shown before moving to the next page, from 1 to 100. With 9 or 12, rows stay complete on wide screens. |
| Results page | Optional. Where a record’s “Back to results” link goes when the visitor arrives from outside your site, for example from Google. |
| Uninstall | If you tick it, deleting the plugin also deletes your fields, settings and records. Leave it unticked if you want to keep your data. |
Careful: if you change the URL base once your site is live, your records’ addresses change. If Google already knows them, you will need to set up redirects.
Create the search page
Now it’s time to show the search to your visitors. Create a new page (Pages → Add New), give it any title and add a Shortcode block. Inside, type:
[querypress]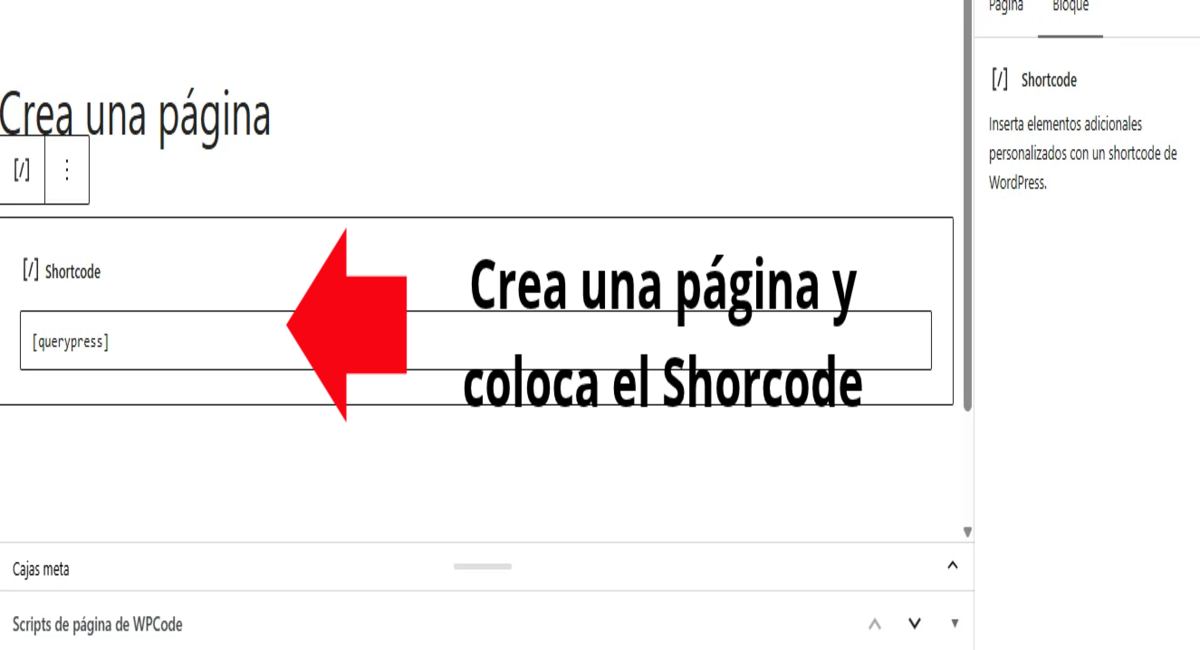
Click Publish and open the page. Your search is up and running.
Tip: if instead of the search you see the text [querypress] written on the page, the block is not a “Shortcode” block. Change it to that block type.
See the result
This is what your visitors will see. If records have a featured image, the card shows it at the top. If not, it appears without an image. You choose.
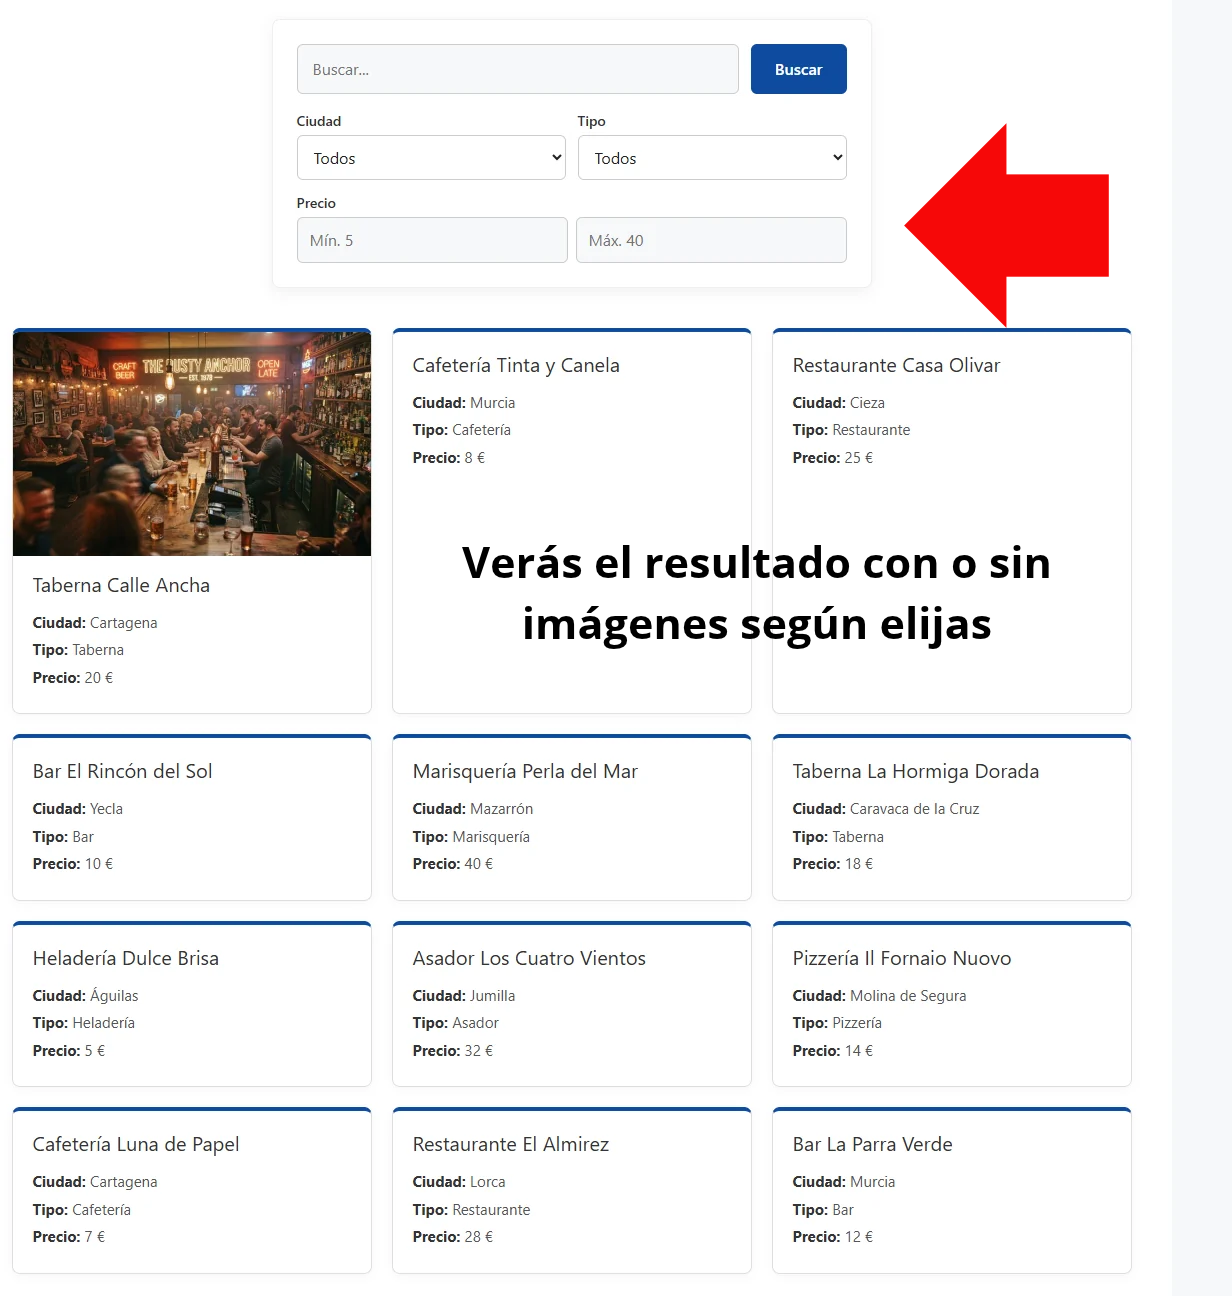
How search works
- As you type. Results update on their own, without clicking anything or reloading the page.
- Accents and capitals don’t matter. “cafe” finds “Café”.
- From the beginning of the word. “mad” finds “Madrid”.
- Every word counts. “bar madrid” looks for records that contain both.
- Filters (dropdowns, ranges and category) apply instantly and combine with each other and with the text.
- Pages. If there are more results than fit, pagination appears below.
- If there is nothing to show, you’ll see “No results found.”
The browser’s Back button works as expected: you return to the search with its filters.
The search index
To keep search fast even with thousands of records, QueryPress keeps its own search index. It updates automatically every time you publish, edit, delete or trash a record, or when you change which fields are searchable or filterable. Normally you won’t need to do anything.
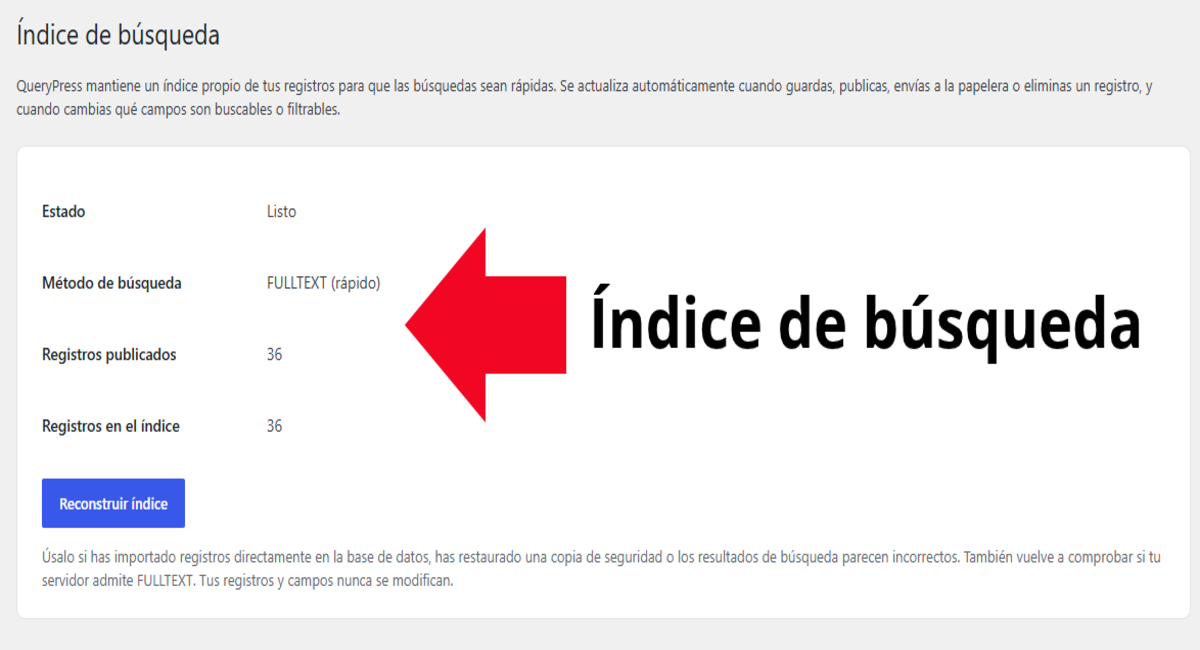
On this screen you see the State (it should say “Ready”), the Search method, how many records are published and how many are in the index. Those two numbers should match.
Click Rebuild index if:
- you imported records directly into the database,
- you restored a backup,
- or the search results are not what you expect.
You’ll see a progress bar. Your records and fields are never modified.
Shortcode options
The basic shortcode [querypress] shows all your records. You can adjust it with these options:
| Option | What it does | Example |
|---|---|---|
per_page | How many results per page, for this search only. | [querypress per_page="12"] |
category | Shows only the records in one category. Use its slug; for several, separate them with commas. Filters are calculated with that category only. | [querypress category="businesses"] |
show_filters | no hides every filter and leaves only the search box. | [querypress show_filters="no"] |
show_category_filter | no hides only the category dropdown. | [querypress show_category_filter="no"] |
You can combine them, and you can have several searches on the same site, each on its own page and with its own category:
[querypress category="products" per_page="12" show_category_filter="no"]If you have QueryPress Pro
Very important: QueryPress Pro doesn’t work on its own. It is an add-on that needs the free QueryPress plugin installed and activated. If you install only Pro, it will tell you the free plugin is missing and won’t activate.
The right order is always the same:
- Install and activate the free plugin following the steps in this guide. If you don’t have it yet, download it here.
- Install Pro. After buying you receive an email with your license key and a link to download the plugin. Go to Plugins → Add New → Upload Plugin, upload the Pro .zip file and click Activate Plugin.
- Paste your license key when asked.
- Choose your design in QueryPress → Design: palette, layout and shape, with a live preview. Save and you’re done.
Pro never modifies your fields or records: it only adds design and the new field types. If you want a different layout on a specific search, add layout to the shortcode, for example [querypress layout="rows"] (possible values: cards, list, compact and rows).
Want to see what it includes, examples and pricing? Visit the QueryPress Pro page.
Frequently asked questions
A record doesn’t appear in the search
Check that it is published (not a draft). Then go to QueryPress → Search index: if records are missing, click Rebuild index.
A field doesn’t appear in the filters
Edit the field in QueryPress → Fields and tick Filterable. If it is a text field, some record must have a value saved in it for the dropdown to be created.
A value doesn’t appear on the card
Edit the field and tick Show in the results card. Fields that are empty in a record are not shown.
I change a setting and don’t see the change on my site
If you use a caching plugin, purge the cache and reload the page.
Can I rename “Records”?
Yes. In Settings, change “Name of one record” and “Name of all records” to whatever you prefer.
What happens to my data if I delete the plugin?
Nothing, unless you ticked the option to delete it in Settings → Uninstall. If you reinstall it, you get everything back.
Is it available in other languages?
QueryPress is available in English and Spanish. It is shown in the language of your WordPress site.
Can I install only QueryPress Pro?
No. QueryPress Pro is an add-on and needs the free QueryPress plugin installed and activated. Install the free plugin first, following this guide, and then Pro, as explained in the If you have QueryPress Pro section.
Ready to try it?
Download QueryPress for free and have your search running in minutes. If you later want QueryPress Pro, you’ll need this free plugin installed.
Download QueryPress for free